
In an ideal world, components would only be purchased from the original producer, a franchised distributor, or an approved non-franchised source. However, this is never an ideal world. With the majority of components being counterfeited falling in the $1 to $10 range, this is a problem for all.
In recent years the incidence of counterfeit parts has been highlighted more in the US than in Europe, particularly in the military market. In Europe we have also seen many examples of counterfeit connectors and cabling, which can be life threating.
A simple approach to minimise counterfeit components passing through goods receipt to production is to create a component reference database. Reference components and images of known good components can be used for future comparison.
The following issues should be considered by engineers for inclusion in their company database. Reference component details should be obtained when a component is known to be going obsolete, is only available on long lead times, difficult to obtain or found to be in circulation as a counterfeit product. Using a spreadsheet provides a simple way of storing data and links to other information.
Where components are being used in existing products or being considered in new products that are single-source or on long lead times, they should be added to the component database. Where components are considered to be high risk, are knowingly purchased from a new source or the supplier has not been previously qualified, reference samples must be obtained for review and possible testing.
A golden board assembly is often held in manufacture as a reference for build quality or as an inspection reference, and could be used by goods receipt staff. This is an ideal solution for OEMs and also provides confidence for contract assembly staff as a working product is always the best reference.
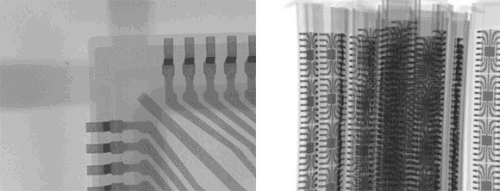
X-ray inspection is a very powerful tool to examine a component or a batch of components without taking them out of their protective packaging. X-ray allows the lead frames, die size, bond wire type and package type to be defined. The examples in Figure 1 show components inspected without opening the sealed MSD bags.
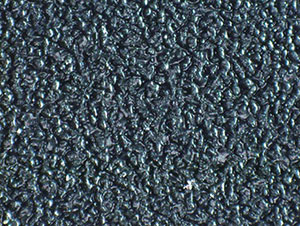
A guide to inspection of plastic ICs can be conducted by production staff after some hands-on training, and creating a reference guide for counterfeit avoidance with samples like the one shown in Figure 2. Inspect the surface of the component body. All surfaces should have a similar surface appearance and reflect light in a similar manner.
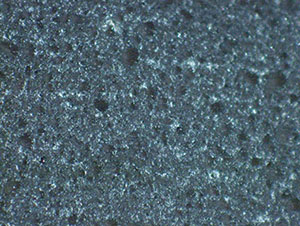
If a surface has been modified/ground to remove previous marks, there will be a difference in the surface, particularly around the markings. The optical image in Figure 3 shows the sharply defined moulding nodules have been flattened.
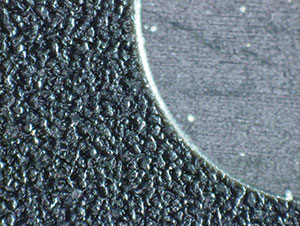
Any modification to the surface may change the appearance of surface features like moulding marks, laser marks and pin dimple indicators when compared with reference samples. In the example in Figure 4, the surface of the plastic gives the appearance of having been produced with sharp edges to the mould contours and there are signs of scratching on the surface of the mould contours.
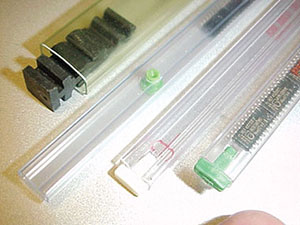
In the case of stick feeding of plastic components, it would be unusual to see any supplier or distributor providing different types of tube stoppers in the same lot of components (Figure 5). Even if the distributor splits up quantity, it’s good practice to be consistent, unlike this example.
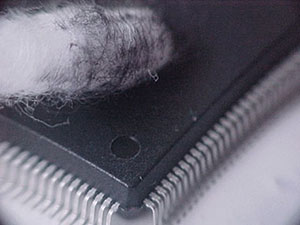
Figure 6 shows a clear component failure where parts have been remarked. During a hands-on session of training we tested samples with acetone on a cotton bud. On a standard QFF component from a reputable supplier, the solvent would have no effect on the parts.
A reference source/photo guide should be compiled of existing qualified manufacturers’ logos, packing labels, SMT reel labels and outer packing labels for use at goods receipt inspection. This may take time to compile but if you don’t start now it’s going to be more of a problem in the future. If you lack good counterfeit examples or testing images, we have created a photo album to help you set up your own training for staff. The counterfeit component testing photo album is available online and makes setting up your own reference samples easier for quality control staff.
Select and appoint an independent laboratory to conduct component testing when specialist tests may be required for independent verification. It makes sense to have someone on call when you need support, and have company approval and financial issues sorted out in advance so staff can simply send parts for inspection for a fast response.

We have been running counterfeit component avoidance workshops in the USA, UK and mainland Europe. In addition we coordinated a SMART Group training CD-ROM on counterfeit components and an automated inspection system as part of ChipCheck, an EU funded project.
Our workshops feature a free counterfeit component guide which consists of 28 posters showing test methods and example component issues. You can get posters online at www.bobwillis.co.uk..
Bob Willis is a process engineer working in the electronics industry, providing online training, consultancy and product failure analysis. Bob offers workshops on conventional and lead-free on site for customers. He sets up and optimises production lines for users and suppliers at exhibitions and also provides conferences and workshops worldwide.
For further information on counterfeit avoidance procedures, lead-free training workshops and training materials, lead-free and process support, visit www.bobwillis.co.uk
© Technews Publishing (Pty) Ltd | All Rights Reserved